Cleaning Tarnished Brass Door Furniture
Lacquered brass door furniture can tarnish when the protective lacquer coating breaks down. Tarnish is a form of thin corrosion which will only develop on the surface of the bare metal. Its formation actually protects the metal underneath and some people prefer to keep this antique style dulled down effect.
Many people however prefer bright shiny brass. To maintain this shiny look, nearly all brass door furniture has a protective coat of clear lacquer to protect the metal and prevent it tarnishing. The lacquer will keep the brass looking good for some time, but various external factors will eventually break down the coating leaving the brass exposed and, after a while, it will become discoloured. If you live near the sea or a main road, salt spray, humidity and pollution are all factors which will accelerate this process.
Just because your brass has tarnished due to lacquer breakdown doesn’t mean you need to replace it. Renovating and up cycling items instead of buying new is good practice and we will show you a procedure to get your tarnished brass door furniture looking like new. This procedure is for standard lacquered solid brass (by far the most popular type seen) and not intended for PVD brass, Stainless brass, Titan brass, Everbrite brass or any other special finish. Test a small inconspicuous area if you are unsure about the type of finish you have.
1) Removing the piece from the door:
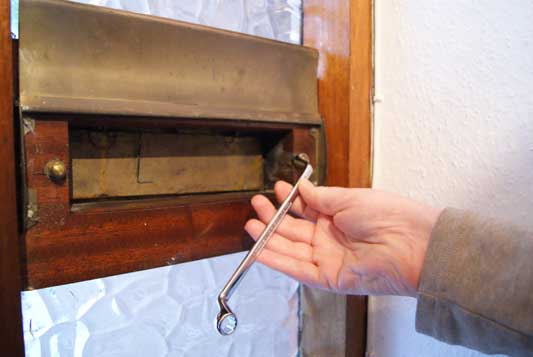
We will use a letterplate in this example. Undo the two bolts at the back of your letterplate and carefully remove it from the front taking care not to damage paint or varnish on the door. You may need to run a craft knife around the edge if it has stuck to the door with paint. Remove the two studs from the back of the letter plate (with a pair of grips if necessary) and retain them. We recommend that a table or workbench is set up outdoors for the procedure as fumes are given off and it can be a bit messy, so wear some old clothes. Collect together or obtain the following:
- A small tin of Nitromours Paint and varnish remover.
- A small paint brush.
- An appropriate size spanner to loosen the fixing bolts
- A bottle of Rustins Brass Restorer
- A tin of Brasso or similar metal polish.
- Some car wax polish e.g. Mer
- Super fine grade 0000 wire wool (do not use coarser, must be 0000 grade)
- Some old Newspaper and Paper towel
- A couple of soft microfibre polishing cloths
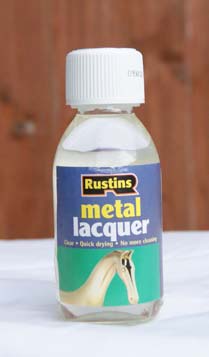
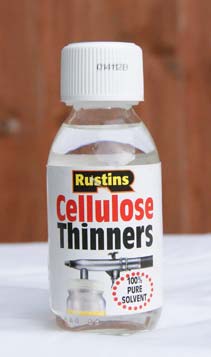
- Some cellulose thinners and a bottle of Rustins Metal lacquer (only needed if you intend to relacquer the item)
- Some disposable latex rubber or nitrile gloves.
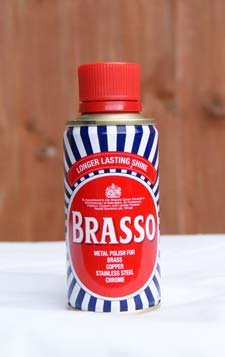
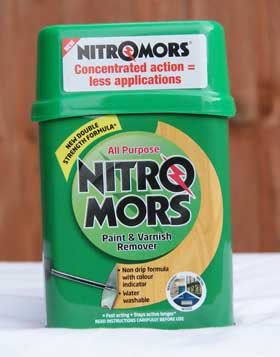
For all parts of the procedure always put safety first, wear protective gloves and follow all safety instructions on the respective products.
2) Preparing to remove the old lacquer: The aim is to ultimately remove any remnants of the old lacquer to get back to the bare metal surface. Place the piece on some old newspaper on your work table. To start the process we will use Nitromors paint and varnish remover, which is also designed to remove lacquer.
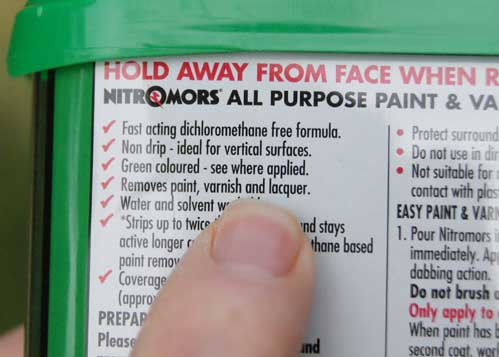
A thick coat is applied by brush using a dabbing action. After about 10 minutes, when blistering may have started, another coat is applied and then the piece is left for 40 minutes. Now depending on the type, your lacquer may or may not react to the paint stripper, so it may not blister at all. Do not worry at this point if there appears to be no reaction because it will still help in the next stage. Firstly it will likely remove any paint or clear wood varnish that has been coated over the edges of the letter plate (and therefore over the letter plate lacquer) during decorating. Secondly it will also soften up the lacquer slightly for the next stage. After 40 mins you can clean off and wash down the surface with water and dry off with a paper towel (hose pipe over a bucket). If the paint stripper is effective and has blistered and removed the lacquer, you can continue to use some of the wire wool dipped in paint stripper to help removal of any remnants, but if the letter plate looks no different and has not blistered, just leave it and proceed to the next stage.
3) Treat with Brass Restorer: Next wash out the paint stripper from your brush with water and dry out before giving the surface a liberal coat of Rustins Brass Restorer. Leave it for a few minutes then rub the surface with super fine grade 0000 wire wool. The softened lacquer should start to dissolve and simply wipe away with the wire wool. Give it another coat and repeat if necessary to remove all traces of the lacquer. Let the restorer do the work, you do not need to put much effort into this, it is quite easy and the lacquer will just wipe off with the wire wool. Next, wash the surface again with water and dry off with a paper towel. The item will now be starting to look lighter like new brass, but will likely have a dull appearance. You can rub the dry surface with grade 0000 superfine wire wool if necessary to smooth away the dullness on the surface and bring up some of the shine.
4) Polish up with metal polish: Now to really bring out that gleaming brass shine, we will finish off with a metal polish such as Brasso. Apply with a soft cloth and polish off when dry with another clean soft cloth turning regularly. The piece should now start to show a glossy shine and look like new.
5) Finishing options: At this stage we could simply replace the letterplate and maintain it by cleaning with metal polish from time to time. You may well consider that you worked hard to remove the lacquer, don’t wish to repeat the process in the future, and are happy to clean the brass from time to time with metal polish. The duration between cleans can be extended by application of a wax polish (as you would wax a car). Bare un-lacquered metal may also show up finger prints when handled and this does not happen when the surface is waxed, so waxing is definitely worth doing regularly and especially each time the item is cleaned with metal polish. If you live in a high pollution area where lacquer quickly breaks down, then this is probably the best way to maintain your brass. Do not however wax the piece if you are intending to re-lacquer after cleaning.
If your lacquer previously lasted for a good period of time and you want easy future maintenance, then you can recoat the brass in metal lacquer as an alternative to the above. You will require some Rustins metal lacquer and cellulose thinners to clean brushes or thin the lacquer for spraying. Some people use clear lacquer aerosol sprays as used on cars, but automotive lacquer can be hard to remove should this be necessary in the future. So we do not recommend this and prefer the Rustins product.
6) Re-lacquering: Before starting to re-lacquer, remove all traces of excess metal polish with warm soapy water and thoroughly dry with a lint free cloth or paper towel. Best protection is achieved by applying two coats, allowing the first coat to dry for a few hours. You can apply with a soft brush using quick even strokes. Alternatively, thin down and apply with an airbrush, building up the fine coat to a satisfactory finish.
7) Finishing touches: When the lacquer has fully dried, the letterplate can be replaced. After a few days and once the lacquer has hardened, a good tip is to give the newly lacquered piece a wax (as you would a car) from time to time even though it has been lacquered. This will help to preserve the lacquer for longer. Whilst replacing, give the letterplate spring, the fixing studs or any mechanism a smear of grease to preserve them from corrosion.

You can repeat the process on all the brass pieces on your front door and you will soon have them looking like new. Internal lacquered brass tends not to suffer because, unlike external brass, it is in a good environment. It is rare that you will need to strip the lacquer with these products, except perhaps in a bathroom where the damp moist air may have broken down the surface.
For locations that are susceptible to tarnishing there are brass products which will not tarnish and are easier to maintain, commonly known as PVD Brass, Everbrite or Stainless Brass. These are manufactured using a process called Physical Vapour Deposition (PVD) which involves depositing molecules of durable metals onto the brass surface in a chamber. The thin layer prevents the brass from discolouration and tarnishing. You will still need to clean this product however, but it is far easier to maintain than conventional lacquered brass.
